Before You Connect Netflix to Your TV, Read This (I Learned the Hard Way)

When I first tried to connect Netflix to my TV, I assumed it would be a simple process that would take only a few minutes. However, what I actually experienced was quite different. I turned on my TV, pressed a few buttons on the remote, and expected to find Netflix immediately. But instead, I found myself confused and slightly frustrated. There was no Netflix app visible, and I wasn’t sure whether the problem was with my TV, my internet connection, or something else entirely. At one point, I even wondered if my account had an issue because the app simply wasn’t appearing. This initial confusion made me realize that connecting Netflix to a TV is not always as straightforward as it seems, especially if you are not familiar with the different types of TVs and connection methods.

As I continued trying to solve the problem, I decided to look into various sources for guidance. I searched online articles, watched video tutorials, and even checked community forums where people shared their own experiences. Interestingly, each source seemed to suggest slightly different solutions. Some emphasized that installing the app directly from the TV was the easiest method, while others strongly recommended using external devices like streaming sticks. A few guides focused heavily on HDMI connections using laptops, presenting it as the most reliable option. I also noticed that some advice seemed outdated, referring to older TV models or previous versions of Netflix apps. Because of this, I felt the need to compare multiple sources carefully rather than relying on just one.

During this process, I began to wonder why the information I found varied so much. After looking deeper, I realized that the differences were mainly due to variations in users’ situations. The type of TV played a huge role—whether it was a Smart TV or a regular TV significantly changed the available options. In addition, regional differences, device compatibility, and even the version of the TV operating system affected the setup process. Another important factor was the user’s level of technical familiarity. Some guides assumed a basic understanding of technology, while others were written for complete beginners. This explained why certain instructions felt overly complicated while others seemed too simplistic.

It became clear to me that there is no single “correct” way that works for everyone; instead, the best method depends on individual circumstances.

At that point, I decided to study the topic more systematically rather than jumping between random solutions.

First, I confirmed whether my TV was a Smart TV by checking for an app store, Wi-Fi capability, and dedicated buttons on the remote.

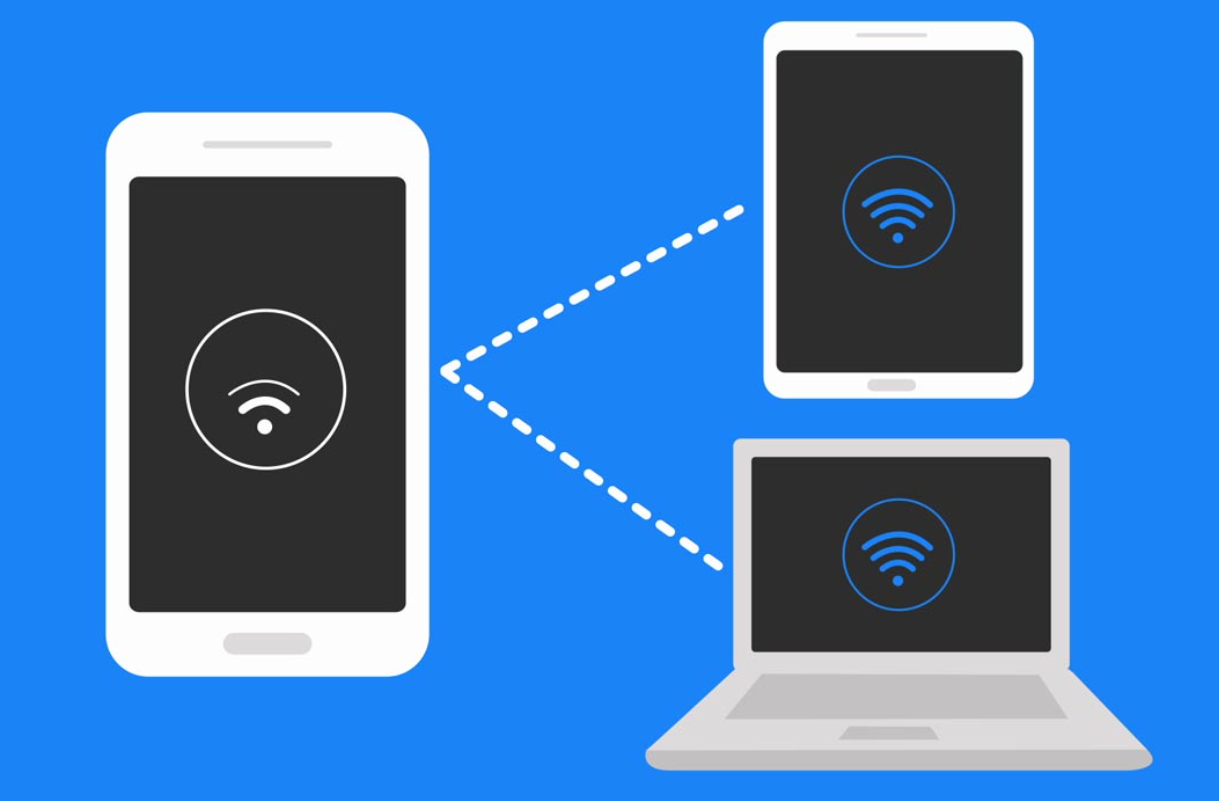
This step alone clarified a lot of confusion. Then, I learned about the three main connection methods: using a built-in app, connecting via HDMI, and using a streaming device. I also took time to understand the importance of internet speed, which I had previously underestimated. I checked my Wi-Fi performance and realized that even a correct setup would not work properly if the connection was unstable. Additionally, I learned about different login methods for Netflix on TVs, including the code-based login system, which turned out to be much more convenient than typing long passwords with a remote control.

After organizing all this information, I carefully evaluated my own situation to decide which method would be most suitable. My TV did support basic smart features, but the interface was slow, and the app store was limited. While the HDMI method worked, I found it inconvenient to connect my laptop every time I wanted to watch something. In the end, I chose to use a streaming device. Although it required an initial purchase, it provided a smoother and more flexible experience overall. The setup process was straightforward, and once it was completed, I could access Netflix and other streaming services much more easily. The performance was also noticeably better compared to my TV’s built-in system.

The reason I ultimately selected this option was based on a balance between convenience, performance, and long-term usability. I realized that while free or simpler methods might work temporarily, investing in a proper solution could save time and reduce frustration in the long run.

This experience taught me that understanding the basics—such as TV type, connection options, and internet requirements—is essential before making a decision.

Without that knowledge, it is easy to waste time trying methods that are not suitable for your specific setup.

Looking back, the process was more complicated than I initially expected, but it was also a valuable learning experience. By going through trial and error, comparing different sources, and studying the fundamentals, I was able to find the most efficient solution for my needs. Now, connecting Netflix to my TV feels simple and intuitive, but that is only because I took the time to understand how everything works beforehand.

Apps Keep Crashing? I Had the Same Problem (This Fixed It)

When I first started experiencing frequent app crashes on my smartphone, I did not immediately realize how common or solvable the issue was. At first, it felt like a random and frustrating problem. Apps would suddenly close while I was watching videos, replying to messages, or even in the middle of simple tasks. Initially, I assumed it was just a temporary glitch, so I ignored it. However, as the crashes became more frequent, it started to interfere with my daily routine. Simple activities began to take longer, and I found myself reopening the same apps multiple times a day. This inconvenience pushed me to seriously look into the root cause and possible solutions.

As I began researching, I compared advice from multiple sources, including tech blogs, community forums, and official support pages. Interestingly, while most sources agreed on the general causes—such as outdated apps, low storage, or software bugs—the specific recommendations often differed. Some emphasized clearing cache as the first and most important step, while others suggested reinstalling apps immediately. Certain forums insisted that background apps were the main culprit, whereas official guides focused more on system updates and compatibility issues. This variety of answers initially made the situation more confusing rather than helpful, as it was not clear which solution would be the most effective in my case.

The reason behind these differences became clearer as I continued comparing and analyzing the information. Each source was often based on different user environments and device conditions. For example, users with older phones frequently experienced crashes due to compatibility issues, while those with newer devices often faced problems related to excessive background processes or temporary bugs. Additionally, Android and iPhone systems handle memory and cache differently, which explains why some solutions applied only to one platform.

I realized that there was no single universal fix; instead, the correct approach depended on identifying the specific cause of the problem on my own device.

With this understanding, I decided to study the issue more systematically.

I learned that app crashes are generally caused by a few key factors: insufficient storage, outdated software, corrupted cache data, and memory overload.

I also discovered how smartphones manage resources. For instance, when storage is nearly full, the system cannot properly allocate space for temporary files, which can cause apps to fail. Similarly, when too many apps run in the background, the available RAM becomes limited, leading to instability. Cache data, while useful for speeding up performance, can sometimes become corrupted and produce the opposite effect. This deeper understanding allowed me to approach the problem logically rather than randomly trying fixes.

Based on what I learned, I began testing solutions one by one instead of applying everything at once. First, I checked my storage and realized it was nearly full, so I deleted unused apps and unnecessary files. Next, I updated all my apps and the system software to the latest versions. After that, I cleared cache data for frequently used apps and closed background applications regularly. I also made it a habit to restart my phone periodically, which helps clear temporary system issues. Through this step-by-step process, I was able to identify which actions had the most impact.

In the end, my final approach was not based on a single solution but on a combination of optimized habits. I chose to maintain at least 20% free storage, keep all apps and the operating system updated, and regularly manage background apps. The reason for this choice is that it addresses the root causes rather than just the symptoms.

Instead of reacting to crashes after they happen, this method prevents them from occurring in the first place.

Since adopting these practices, I have noticed a significant improvement in my phone’s stability and performance.

Through this experience, I realized that many smartphone issues that seem complex are actually manageable with a bit of understanding and consistency. Rather than relying solely on scattered advice, taking the time to compare, analyze, and learn the underlying reasons made a substantial difference. This process not only solved my immediate problem but also helped me use my device more efficiently in the long run.

My Phone Took Forever to Charge… Until I Fixed This

When I first started noticing that my phone was charging unusually slowly, I honestly thought it was just temporary. At first, it did not seem like a serious issue. However, over time, the problem became increasingly noticeable. What used to take about an hour or so to reach a decent battery level suddenly started taking several hours. There were even moments when I felt like the battery percentage barely moved despite being plugged in for a long time.

This became particularly frustrating in my daily routine. Since I rely heavily on my phone for communication, entertainment, and even work-related tasks, slow charging disrupted my schedule. There were times when I needed to go out, but my phone was still at a low battery level even after being connected to the charger for quite a while. That was when I realized I needed to seriously look into the issue instead of ignoring it.

To understand what was going on, I started comparing advice from various sources. I checked online articles, tech forums, and even watched several videos explaining slow charging problems. Additionally, I looked into user reviews and discussions where people shared their own experiences. Some sources emphasized hardware issues, while others focused more on software-related causes. I also considered visiting a repair shop, but before doing that, I wanted to gather as much information as possible myself.

What I found interesting was that different sources often gave slightly different explanations or priorities. Some claimed that the charging cable was the most common issue, while others insisted that battery degradation was the main cause. There were also conflicting opinions about whether using the phone while charging had a significant impact. At first, this inconsistency was confusing. However, after comparing multiple viewpoints,

I realized that the reason for these differences was quite simple: slow charging is not caused by just one factor.

It can result from a combination of several small issues rather than a single major problem.

As I continued researching, I began to organize the information I had learned. I discovered that charging speed depends heavily on the quality of the charging cable and adapter. Low-quality or damaged cables cannot deliver sufficient power, which slows down the entire process. I also learned that the power source matters more than I initially thought. Charging from a laptop or car USB port provides significantly less power compared to a proper wall outlet.

Another important factor I came across was the condition of the charging port. Dust and debris can accumulate inside the port over time, preventing a stable connection. This was something I had never considered before. In addition, background apps running on the phone can consume power even while charging, making it seem slower. Heat management also turned out to be crucial, as phones automatically reduce charging speed to prevent overheating.

Battery health was another key point in my research. Lithium-ion batteries naturally degrade over time, which affects both charging speed and overall battery performance. Finally, I learned that some devices have fast charging features that need to be manually enabled in the settings, which I had not checked before.

After gathering all this information, I decided to take a step-by-step approach rather than jumping to conclusions. I first replaced my charging cable with a certified, high-quality one. Then, I made sure to use a proper wall adapter that supports fast charging. I also carefully cleaned the charging port and started closing unnecessary background apps before charging. Additionally, I avoided using my phone while it was plugged in and made an effort to keep it cool.

The results were noticeable almost immediately. The charging speed improved significantly, and the overall experience became much more reliable. Fortunately, I realized that my issue was not due to severe battery degradation, so I did not need to replace the battery.

In the end, the reason I chose this approach was because it addressed multiple possible causes at once without requiring unnecessary expenses. Instead of assuming the worst and going straight for a battery replacement or repair service, I focused on the most common and easily fixable issues first. This not only saved money but also helped me better understand how my device works.

Through this experience, I learned that slow charging is often a result of small, overlooked factors rather than a single critical failure.

By taking the time to analyze the problem carefully and compare different sources of information, I was able to find an effective solution on my own.

I Kept Checking My Phone for Notifications… But There Were None (Here’s Why

I encountered a rather strange and confusing issue with my smartphone. I repeatedly felt my phone vibrate, only to check it and find no notifications, messages, or alerts. At first, I dismissed it as a minor misunderstanding or a momentary distraction. However, as the same experience continued to occur multiple times throughout the day, it became increasingly difficult to ignore.

The situation was particularly frustrating because it created unnecessary interruptions. Each time I felt the vibration, I instinctively reached for my phone, expecting something important. When nothing appeared, it left me feeling both confused and slightly concerned. Over time, this pattern began to affect my focus and productivity.

What made the situation even more puzzling was that the vibrations seemed completely random. They did not follow any clear pattern, nor were they tied to any visible app activity. This led me to consider several possibilities, including hidden notifications, software glitches, or even hardware-related issues.

Rather than continuing to guess, I decided to investigate the issue thoroughly. I wanted to understand whether this was a common problem and, more importantly, how it could be resolved effectively.


As I began researching the issue, I explored a wide variety of sources, including technology blogs, user forums, video tutorials, and support documentation. While many sources acknowledged the phenomenon of random or “phantom” vibrations, the explanations and solutions varied considerably.

Some sources strongly emphasized notification settings as the primary cause. They explained that many apps are configured to vibrate without displaying visible alerts, especially messaging or social media applications. Other sources focused on background activity, suggesting that apps syncing data silently could trigger vibrations without user awareness.

There were also explanations related to system-level features. Certain guides pointed out that haptic feedback, such as keyboard vibrations or touch responses, could be mistaken for notifications. Additionally, some sources highlighted system alerts like charging connections or biometric feedback as potential triggers.

Interestingly, a number of sources introduced the concept of “phantom vibration syndrome,” describing it as a psychological phenomenon where users perceive vibrations even when none occur. This added another layer of complexity to the issue.

Furthermore, opinions differed regarding the severity of the problem. Some sources treated it as a simple settings issue that could be resolved quickly, while others suggested deeper causes such as software bugs or misconfigured accessibility features.

Because of these differences, I realized that a single explanation would not be sufficient. I needed to examine each possibility carefully and determine which factors applied to my situation.


After comparing multiple perspectives, I came to understand why the advice varied so widely.

The main reason is that random phone vibrations can originate from multiple independent sources, each requiring a different approach to resolve.

For example, in cases where notifications are the primary cause, adjusting app settings can quickly solve the problem. However, if the vibrations are related to system feedback, such as haptic responses, then disabling those features becomes necessary.

Background app activity is another important factor. Some applications operate silently, syncing data or performing updates without displaying visible notifications. These actions can still trigger vibrations, leading users to believe that something unusual is happening.

The concept of phantom vibration syndrome further explains why some users experience vibrations that are not actually occurring. This psychological factor is influenced by habitual phone usage and the expectation of frequent notifications.

Software-related issues also contribute to the variation in advice. Bugs or glitches introduced by system updates can cause unexpected behavior, including random vibrations. In such cases, solutions like restarting the device or updating the software become relevant.

Ultimately, the diversity of advice reflects the complexity of the issue.

Since multiple factors can produce similar symptoms, different users may require different solutions based on their specific circumstances.


Through careful observation and testing, I gained several important insights into the causes of random phone vibrations.

First, I confirmed that notification settings played a significant role. Some apps were configured to vibrate without displaying clear alerts, which created the impression of unexplained activity. By reviewing and adjusting these settings, I was able to reduce unnecessary vibrations.

Second, I discovered that haptic feedback contributed more than I initially expected. Features such as keyboard vibration and touch feedback were subtle but frequent, making them easy to misinterpret as notifications. Disabling these features resulted in a noticeable reduction in perceived vibrations.

Third, I examined background app behavior and found that certain applications were actively syncing data. Although they did not display visible notifications, they still triggered vibration responses. Managing app permissions and limiting background activity helped address this issue.

I also considered the possibility of software glitches. Restarting my phone and ensuring that the system was updated to the latest version helped eliminate potential temporary errors.

Additionally, I explored accessibility settings and found that certain interaction features could generate unexpected feedback. Adjusting these settings further reduced irregular vibrations.

Finally, I became aware of the psychological aspect of the issue. By consciously observing when and how I perceived vibrations, I realized that some instances might not have been actual physical events.


After evaluating all the information and testing various solutions, I decided to adopt a comprehensive approach that addressed multiple potential causes simultaneously.

My final setup included carefully reviewing notification settings, disabling unnecessary vibration alerts, turning off haptic feedback, and limiting background app activity. I also ensured that my device was updated and restarted regularly to maintain stable performance.

I chose this approach because it allowed me to systematically eliminate the most common sources of random vibrations without making unnecessary or risky changes. Instead of focusing on a single cause, I addressed all likely factors in a balanced manner.

As a result, the issue was significantly reduced. The random vibrations either disappeared entirely or became rare enough that they no longer caused concern. More importantly, I regained confidence in my device’s behavior and no longer felt distracted by unexpected alerts.


Through this experience, I learned that random phone vibrations are usually not a sign of a serious problem. In most cases, they are caused by a combination of notification settings, system feedback, background activity, and user perception.

By taking the time to understand these factors and applying targeted adjustments, it is possible to resolve the issue effectively.

This process also highlights the importance of being aware of how modern smartphones manage notifications and feedback.

Ultimately, careful analysis, comparison of different sources, and practical testing allowed me to address the problem with confidence. With the right approach, even confusing issues like random vibrations can be understood and resolved without unnecessary stress.

How to Use Your Phone as a Hotspot Without Slowing It Down

Recently, I found myself relying heavily on my smartphone’s hotspot feature. There were situations where I needed internet access on my laptop or tablet, especially when Wi-Fi was unavailable or unstable. At first, using my phone as a hotspot felt incredibly convenient. However, I quickly encountered a frustrating issue—my internet speed dropped significantly whenever I enabled tethering.

The problem became especially noticeable during tasks that required stable connectivity, such as video calls, file downloads, or even simple web browsing. Pages would load slowly, videos would buffer constantly, and online meetings would lag. In some cases, the connection would feel almost unusable.

What made this situation more confusing was that my mobile data itself seemed perfectly fine. When I used apps directly on my phone, the speed was relatively fast and stable. However, the moment I shared that connection through a hotspot, the performance dropped noticeably.

This led me to question whether the issue was related to my phone settings, network limitations, or something else entirely. Rather than immediately assuming that my device or data plan was insufficient, I decided to investigate the issue more thoroughly and find ways to improve hotspot performance without upgrading my plan or device.


As I began researching solutions, I explored a wide range of sources, including technical articles, online forums, video tutorials, and user discussions. While most sources acknowledged that hotspot slowdowns are common, the recommended solutions varied significantly.

Some guides strongly emphasized improving signal strength, suggesting that the quality of the mobile network connection was the most important factor. Others focused on limiting the number of connected devices, arguing that bandwidth sharing was the main cause of slow speeds.

There were also recommendations related to technical settings. For example, many sources advised switching from the 2.4GHz band to the 5GHz band for faster speeds. Meanwhile, other guides highlighted the importance of closing background apps, claiming that hidden data usage could reduce hotspot performance.

Additionally, some sources introduced alternative methods such as USB tethering, describing it as the most stable and fastest option compared to Wi-Fi hotspots. However, not all guides agreed on when this method was necessary.

Another area of difference involved carrier-related limitations. Some sources emphasized the possibility of data throttling, while others barely mentioned it.

Because of these variations, I realized that there was no single universally accepted solution. Instead, I needed to understand the reasoning behind each recommendation and determine which factors applied to my situation.


After comparing multiple sources, I began to understand why the advice differed so much. The primary reason is that hotspot performance depends on several independent factors, and each user may experience a different bottleneck.

For example, if a user has a weak mobile signal, then improving signal strength will have the greatest impact. In contrast, if the signal is already strong, the issue may lie in bandwidth distribution among multiple connected devices.

Similarly, the choice between 2.4GHz and 5GHz bands depends on the environment. The 2.4GHz band provides a longer range but slower speeds, while the 5GHz band offers faster speeds but requires closer proximity. Therefore, the effectiveness of each option depends on how and where the hotspot is being used.

Background data usage is another variable. Some users may have many apps running in the background, consuming bandwidth without their knowledge. In such cases, closing apps can significantly improve performance.

Carrier policies also play a major role. Certain data plans include limits on hotspot usage, after which speeds may be reduced. This explains why some users experience sudden slowdowns despite having a strong signal and optimal settings.

In summary, the variation in advice exists because hotspot performance is influenced by multiple factors, and each user’s situation is unique. Identifying the specific cause is essential for applying the correct solution.


Through careful testing and observation, I learned that improving hotspot performance requires a combination of adjustments rather than a single fix.

First, I confirmed that signal strength is the foundation of hotspot performance. By moving closer to a window and avoiding enclosed spaces, I was able to achieve a stronger and more stable connection, which immediately improved speed.

Second, I experimented with hotspot bands and found that switching to the 5GHz band made a noticeable difference when my devices were nearby. The connection became faster and more responsive, especially for tasks like streaming and downloading.

Third, I realized the importance of limiting connected devices. When multiple devices were connected simultaneously, the speed dropped significantly. By reducing the number of active connections, I was able to maintain better performance.

I also discovered that background apps were consuming data without my awareness. Closing unnecessary apps and disabling automatic updates helped free up bandwidth for the hotspot connection.

Additionally, I tested USB tethering and found it to be the most stable option. The wired connection eliminated wireless interference and provided a consistent speed, making it ideal for tasks that required reliability.

Finally, I became aware of the impact of overheating. When my phone became too hot, performance decreased. By keeping the device cool and avoiding heavy usage while charging, I was able to maintain better speeds.


After evaluating all the information and testing various solutions, I decided to adopt a balanced and practical approach to optimizing my hotspot usage.

My final setup included ensuring a strong mobile signal, switching to the 5GHz band when possible, limiting the number of connected devices, and closing background apps before enabling the hotspot. For tasks that required maximum stability, I chose to use USB tethering.

I selected this approach because it addressed multiple potential causes simultaneously rather than focusing on a single factor. Instead of guessing the root cause, I created a setup that minimized all common limitations.

As a result, I experienced a significant improvement in hotspot performance. Internet speeds became faster and more stable, and issues like lag and buffering were greatly reduced. Most importantly, I was able to achieve this without changing my data plan or purchasing additional equipment.


Through this experience, I learned that slow hotspot performance is not necessarily a limitation of the device itself, but often the result of suboptimal settings and environmental factors.

By understanding how different elements—such as signal strength, network bands, device connections, and background activity—affect performance, it is possible to significantly improve hotspot speed and reliability.

This process required careful research and experimentation, but the results were highly rewarding. With the right adjustments, using a smartphone as a hotspot can be both efficient and dependable, even in demanding situations.

Ultimately, a thoughtful and well-optimized setup can transform a frustrating experience into a reliable solution for staying connected anytime and anywhere.